For most people, getting married means a new monogram. For the monogrammed obsessed (I am not raising my hand at all lol) this could mean a whole newline of items just waiting to be personalized. The most historical and traditional monograms are the single last name initial. However, in this day and age the three letter monogram is the most popular and can come in a wide variety of designs.
When it comes to the proper monogram etiquette here are a few guidelines to help you create the perfect monogram:
Her Monogram
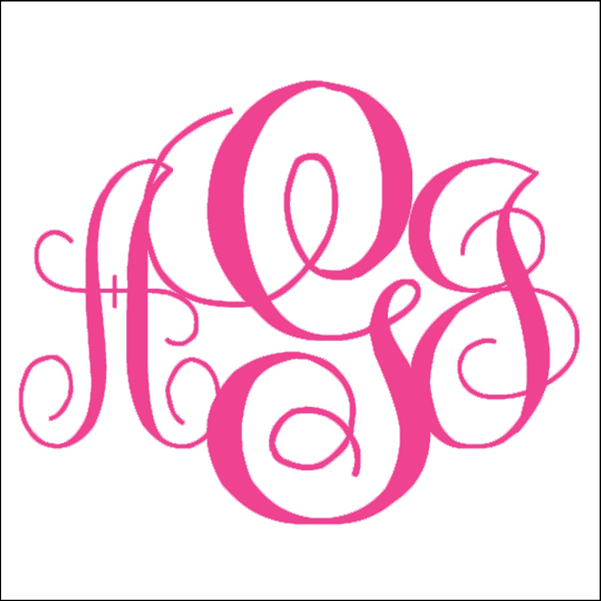
A traditional, three letter, script woman's monogram appears in the format of first initial, last initial, middle initial with the centered last initial larger than the ones on each side. In today's modern age you have so many more options when it comes to your font and style choice so you will also see this similar format for a women's monogram in a wide variety of choices including a circle monogram, diamond monogram, with block lettering or even curlz. Here are some popular choices when it comes to monogramming for a woman... His Monogram
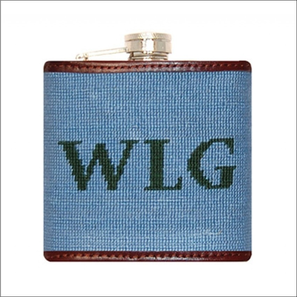
A guy's monogram is a little easier. The most popular monogram option for a guy is a traditional block monogram with the initials in the first, middle, last order. While a male's monogram is not as decorative as a woman's monogram you can still play around with different "manly" fonts in the traditional or block families. (I always consider it a victory if you can get a guy to go for a monogram, so I don't push the boundaries much more than that! lol) Here is an example of a traditional guy's monogram (and a great item to put it on!)... His & Her Monogram
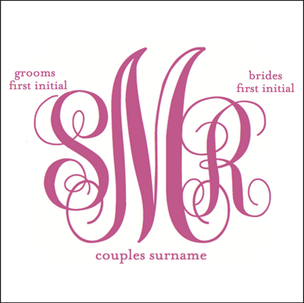
When it comes to creating a monogram for a newly married couple, or any couple for that matter, the monogram will be made up of the woman's first initial, the male's first initial and the couple's last name initial. However the order to which initial goes first can cause some debate. Typically you will find the woman's initial first, but tradition actually states that the male's initial on the left and the woman's initial on the right. Either way, you end up with an adorable new monogram to adorn to your gift for the happily married new couple! I will never pass up an opportunity to add a monogram to an item and love all the fonts and style choices that you can play around with. What is your favorite monogram style to use?
xoxo
Megan
You might also like...
Many of you are probably familiar with the wedding tradition of "something old, something new, something borrowed, and something blue." Some brides are pretty persistent in following this tradition, since it is supposed to bring you good luck when you have all four on your wedding day, and will not take one step down that aisle until they have all four things on that list. The first three items on that list are pretty easy to find for the big day, but it can sometimes get a little tricky incorporating your "something blue" into your wedding day outfit. To help out those brides-to-be I have put together some creative ways on how you can incorporate your "something blue" into your wedding day...
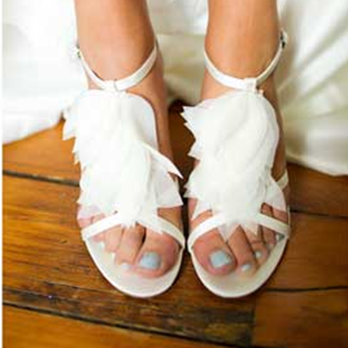
1. Blue Pedicure.
This is a great way to add your pop of blue. More than likely you are planning on getting your nails done before your big day, so choosing a shade of blue is the perfect way to add that something blue without having to add anything else to your to-do list.
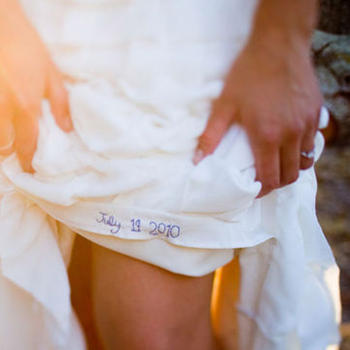
2. Blue Stitching.
For those that don't mind adding a little something to heir wedding gown ask the person handling your alterations if they could add your wedding date or new initials to the hem of your dress in blue. If you can sew this can also be an easy DIY project to complete.
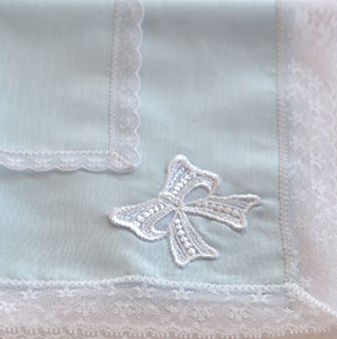
3. Blue Hanky.
I am not saying that it always happens, but I would say most brides (and grooms) will tear up at some point during the wedding ceremony. Why not find an adorable blue hanky to carry with you down the aisle. You can find some great ones on Etsy or ask a relative if they have one (then it could also be your something old or borrowed).
4. Blue Vows.
I'm not says they are to be sad, instead write your vows out on blue paper. This is a great ideas for the bride who is afraid that they might blank when they are in front of so many guests.
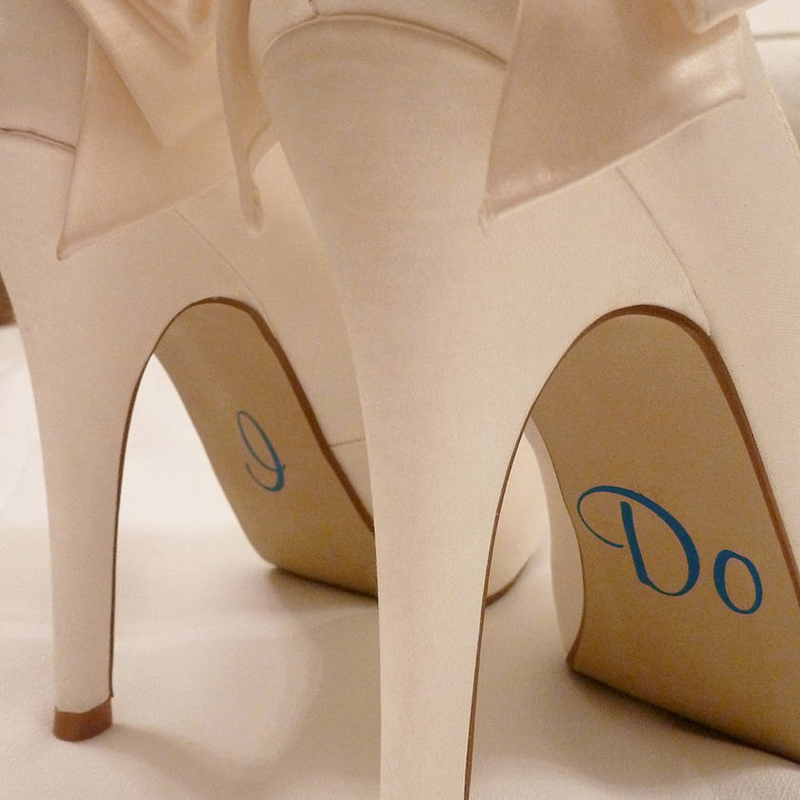
5. Blue "I Do".
This might be one of my favorite ways to add your "something blue." You can get stickers or a blue sharpie to add a cute "I Do" to the bottom of your wedding day shoes.
Which is your favorite way to incorporate your "something blue" into your wedding day?
xoxo
Megan
You might also like...
Just as wedding flowers come in all shapes and sizes so do wedding bouquets. When you are talking with your florist on creating your wedding bouquet you want to choose a bouquet shape that will compliment you and your outfit. Those who are petite should probably lean toward a smaller, more contained bouquet style. While those who are on the taller side you could opt for a more cascading style. One bouquet style that will work for just about everyone is the hand-tied bouquet.
While there are many different styles to choose from here are the six most common wedding bouquet styles:
Beidermeier: Like a nosegay but made up of concentric circles of different flowers for a somewhat striped effect.
Cascade: A waterfall-like "spill" of blooms and greenery that's anchored in a hand-held base. While shorter than most, this is the kind of bouquet that Kate Middleton had for the royal wedding.
Hand-Tied: A dense bunch of blooms loosely hand-tied together. This is the most common and the easiest to make if you are looking for a DIY bouquet project.
Composite: A handmade creation in which different petals or buds are wired together on a single stem, creating the illusion of one giant flower.
Nosegay: A small, round cluster of flowers, all cut to a uniform length. Usually made with one dominant flower or color, nosegays are wrapped tightly with ribbon or lace for a delicate effect.
Pomander: A bloom-covered ball suspended from a ribbon and perfect for child attendants.
No matter which bouquet style you choose, you should know how to carry it so it makes you look stunning. You want to rest your arms just above your hip bones so the bouquet will be positioned close to your natural waist line.
Which bouquet style is your favorite? What kind of bouquet did you have for your wedding?
xoxo
Megan
You might also like...
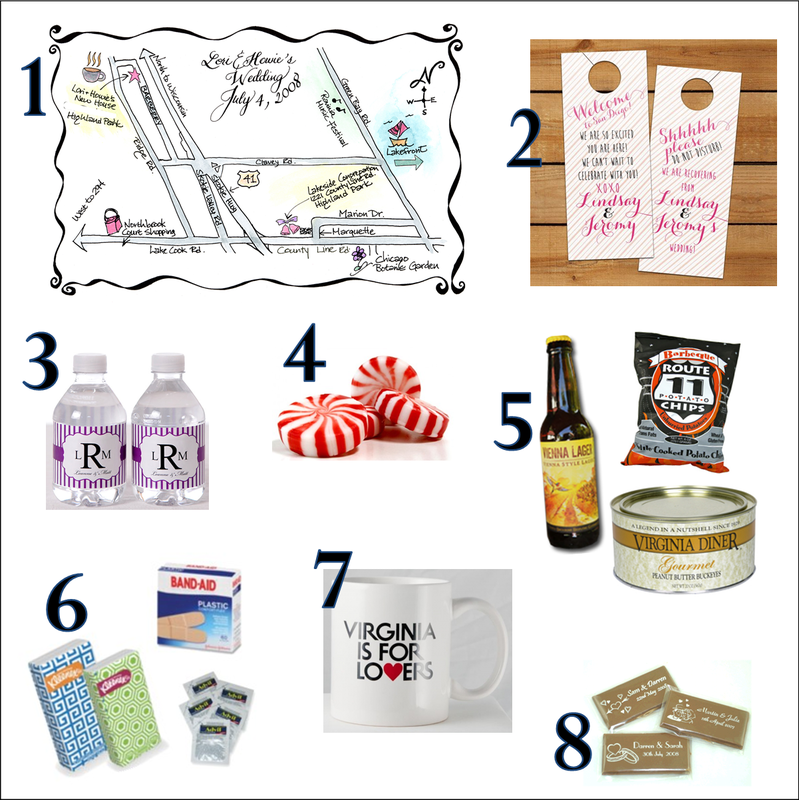
Wedding weekends are always filled with celebration and fun. However, for the out-of-town guests it can sometimes get a little overwhelming when you first arrive as you are not familiar with the area or know exactly where anything is happening. A great way to solve this problem for all your out-of-town guests? A wedding welcome bag! Here are some of my favorite items to include in a wedding welcome bag...
1. Map of the Area. While you and the wedding party will be booked from the minute you get to town until you leave your guests will probably have some free time on their hands. Include a map with your wedding event locations already marked for your guests as well as recommended places to eat and fun places to go. 2. Welcome Door Hanger. This is a cute way to welcome your guests, say thank you for coming and gives them a cute sign to hang on the door for the morning after. This one if from etsy store Diva Gone Domestic Too. 3. Bottle Water. This is a welcome bag must! After a fun night of (too much?) drinking your guests will love that they have water sitting right next to their bed so they don't even have to get up. 4. Mints of Gum. With all the hopping around from one location to the next and partying until the wee hours in celebration of the newly weds, something to freshen the breath will definitely come in handy. 5. Snacks. After a day of traveling having snacks waiting for your guests upon arrival is the perfect solution. For a more personal touch select snacks that are special to the area or are favorites of the bride and groom. 6. Mini Emergency Items. Including travel size or a DIY emergency kit in your welcome bags will save a guest or two from having to run to CVS during their weekend stay. You can check out this past post I did for a full wedding survival kit list. (A hangover kit works wonders too!) 7. Local Mementos. Show your guests why you love where you are getting married by including a memento that they can enjoy or take with them. This could be a souvenir or a special treat from your favorite eatery. 8. Chocolate. You can NEVER go wrong with adding chocolate to a welcome bag (unless you are allergic of course). And if the thought of doing one more DIY project for your wedding will send you over the edge there are great companies, like Bow Tie Bags, that will make them for you! Have you created a welcome bag before? What did you include in your bags?xoxo Megan You might also like...
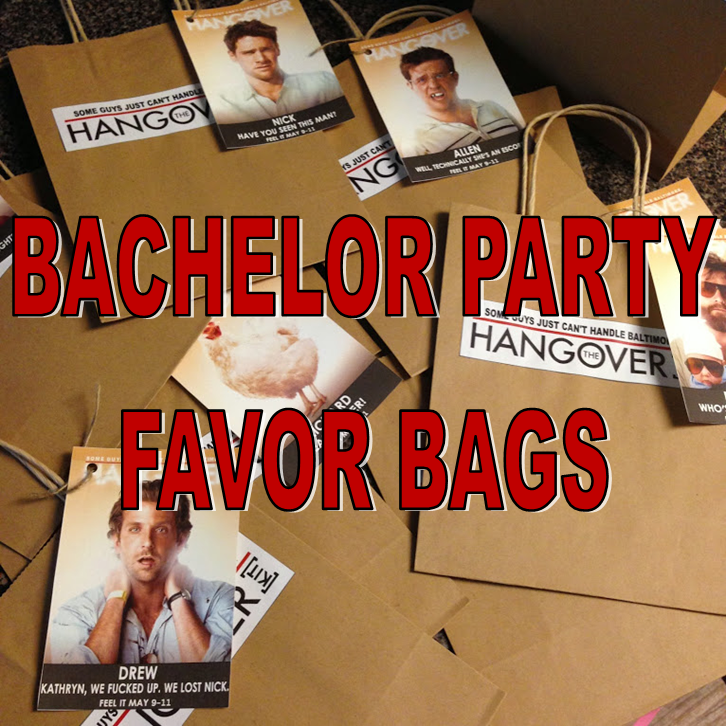
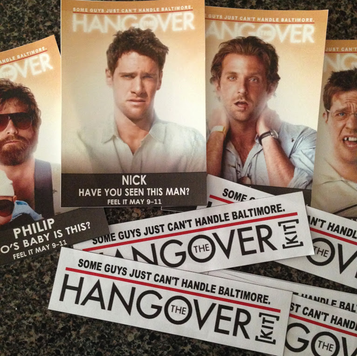
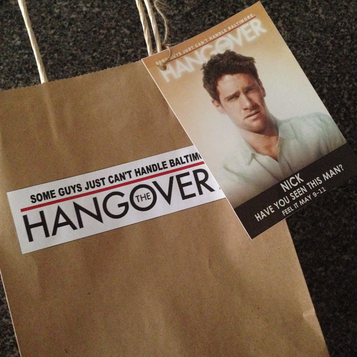
A few weeks ago one of my friends came to me for help. He was attending a bachelor party for one of his college buddies and wanted to put together a favor bag for all the attendees and wanted to know if I had any ideas. Now, I have helped organize, plan and run most every aspect of a wedding but never thought I would ever need to help with a bachelor party. So after talking with my friend about what they would be doing (general plans only lol) I took to Pinterest to see what I could come up with that stayed within the budget and that the guys would all get a kick out of. There are a number of great ideas but my favorite were these Hangover Kit bags from blogger He Asked. I Said Yes. They were really easy to make and all the guys loved them at the bachelor party! Here is how you can make your own Hangover Kit bags... Materials- brown paper bags
- twine
- hole punch
- glue
- scissors
- customized tags
Instructions1. I took each poster image from The Hangover's IMBD page, imported it into Publisher and then added my own customized touches. I also created the bag labels using Publisher. Here were some of my finalized tags. 2. Next I glued the bag labels on and tied on each person's customized tab to the handle with the twine. 3. After all the bags were put together they were ready to be filled. Some great items that you could include are mini water bottles, mini Gatorade bottles, aspirin, gum or mints, airplane bottles, cigars, plastic sunglasses, tums and any other trinkets that relate to the weekend festivities. You could turn your bags into pre or post hangover bags - or both!
What other great Bachelor Party favor ideas have made or seen?
xoxo
Megan
You might also like...
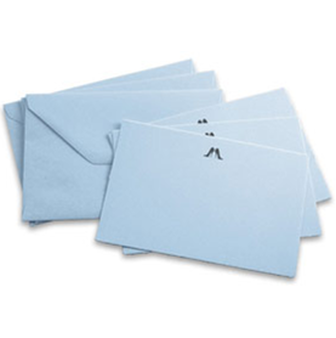
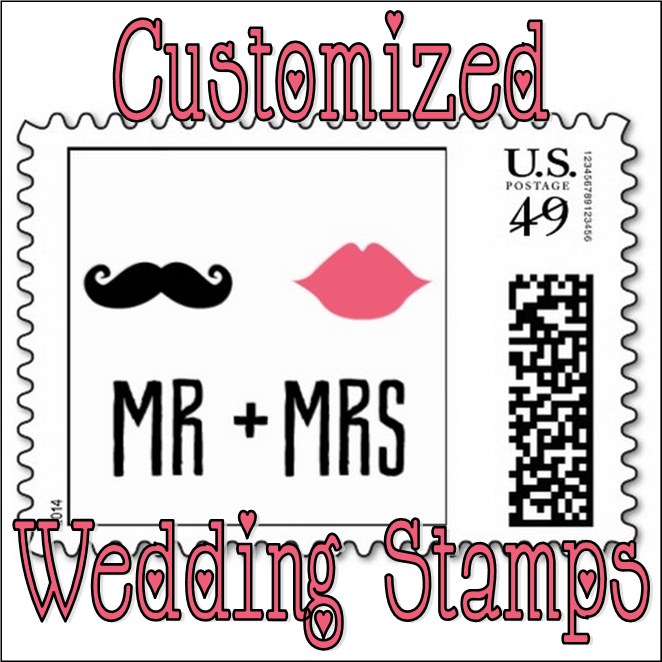
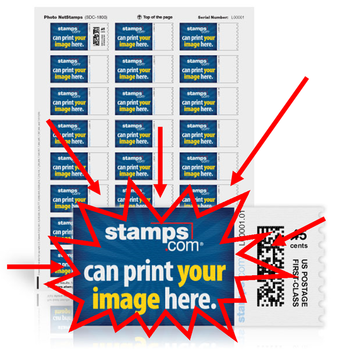
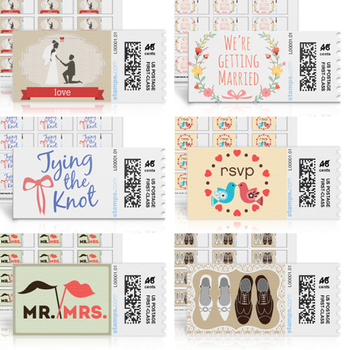
I will admit it now: I absolutely LOVE looking at stationary, especially wedding stationary. I love the different designs, the way you can have your party theme reflected in your invitations, and the way that a font can really accent the invitation perfectly. But above all that I love that invitations are 100% customizable and that you can even create them from scratch. There are just so many opportunities for creativity with them! So, when my aunt sent me a link about NetStamps I fell in love! They have some of the cutest wedding designs to choose from as well as a plethora of other holiday themes. However, what really caught my eye was that they have a "create your own" option. Why have I not thought about this before? I have never once thought to create your own stamps for an event - especially a wedding. All you need is an image that you would like to upload and you are good to go! How easy is that?!?! And if you don't want to create your own customized stamps you can also choose from one from their wedding stamp collection. They have so many cute ones to choose from, like these below! What do you think about creating your own stamps for your wedding stationary? It would be such a cute idea to choose an engagement picture to put on them!
xoxo
Megan
You might also like...
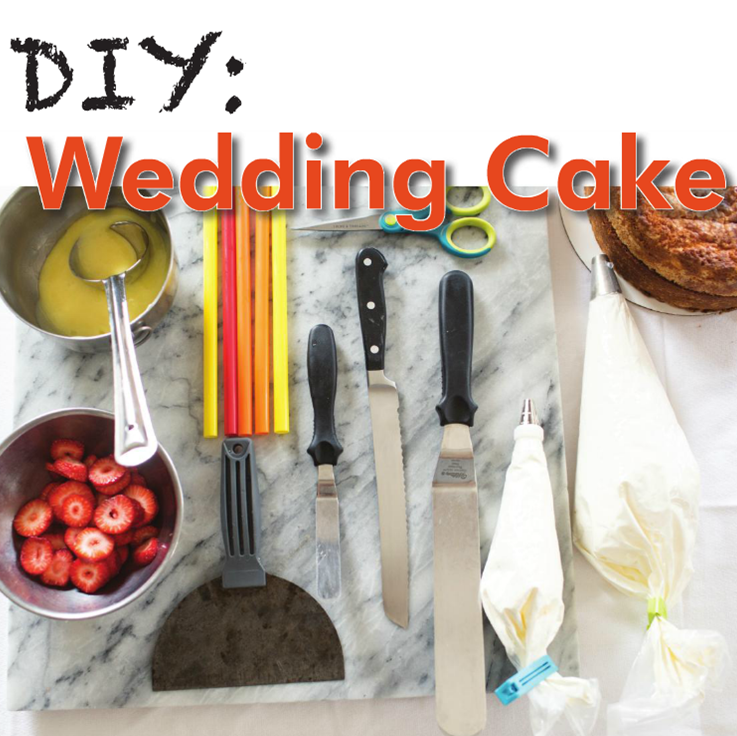
When it comes to deciding what to include and what not to include for your wedding - a cake is one of those things that can be pretty hard to take out. Many brides will get a little sticker shock when it comes to getting a price quote for their wedding cake. This cost can range anywhere from $1.50 to $12 per slice of cake (and we aren't talking about how you would slice a cake at home either) largely depending on where you are getting your cake from, the level of detail and if there is a cake cutting cost at your venue. However, if you are a crafty bride and know your way around the kitchen a DIY wedding cake might be the perfect way to have your cake and eat it too! This probably won't be the easiest DIY project you will ever take on, but I found some great tips from Anita Gupta who runs the specialty cake bakery, Maliha Creations, in Charlottesville, Virginia. To create this DIY cake you will need: - 2 of each 6", 8" & 10" round cakes in your favorite flavor(s)
- 2 cups of cake filling
- 15 cups of buttercream
- fresh sliced strawberries
- small amount of fondant
- cake turntable
- a serrated knife
| - sturdy straws (bubble tea straws)
- a bench scraper
- cake palette knives in various sizes
- buttercream in piping bags
- scissors
- cake card boards (6", 8" & 10")
- fresh flowers for decoration
| Step 1
Begin by torting (slicing horizontally) your cakes. Place your cake on a turn table and put your hand on top of cake. While rotating the turntable, slice through the cake horizontally. Do this for each cake and you will end up with 12 cake rounds (4 of each size).
Step 2
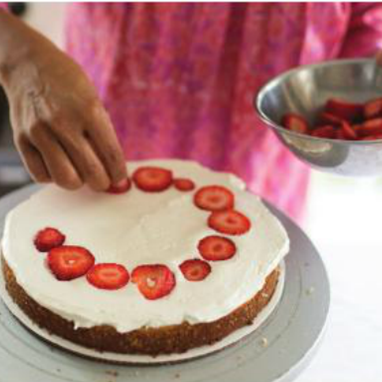
Place one 10" round cake on cake board. Add a large dollop of buttercream and smooth to the edges. Add fresh strawberries (or choice of fruit) to buttercream.
Step 3
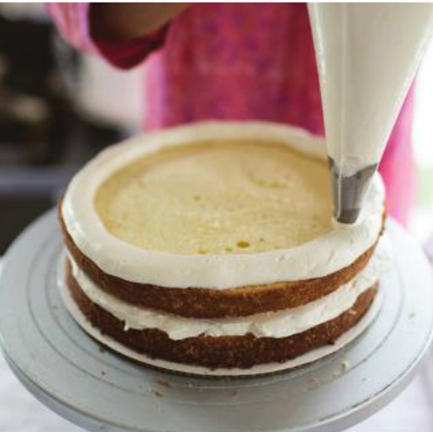
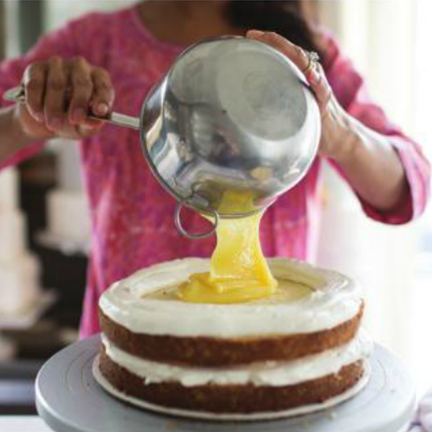
Place another 10" round on top of strawberry/buttercream layer. To add a soft filling, like lemon curd, use piping bag filled with buttercream to pipe a buttercream dam. This will hold the filling in and prevent leakage. Fill center with lemon curd. Step 4
Repeat with another 10" round and strawberry/buttercream layer. Add final 10" round on top. Cover entire 10" round cake with buttercream and refrigerate until cold.
Step 5
After cake has been refrigerated, add more buttercream in thick layers. Using cake board as guide, use bench scraper to remove excess and smooth sides. For a more rustic look, use the small palette knife to create texture on the buttercream. Repeat steps 1-5 with 8' round and 6" round cakes.
Step 6
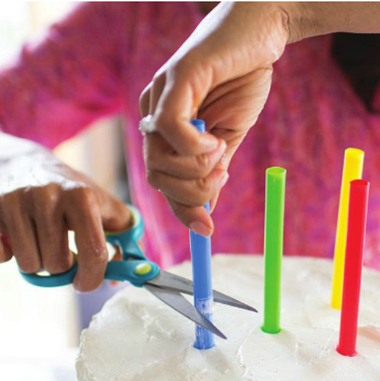
After all 3 tiers have been filled and frosted, the cakes will be stakes. On bottom 10" tier, place 6 bubble tea straws into the cake and push down until the board is reached. Then lift gently and cut straws at the frosting mark. Push straws back into the cake. Take a small amount of fondant and wet slightly. Flatten and put on top of the cake. This will act as the glue to hold the next tier on the cake. Step 7
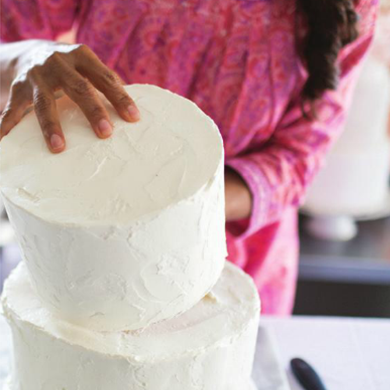
Place the 8" tier on top of the 10" tier and center. Repeat the insertion of straws and the fondant glue. Place the 6" tier on top and your cake is now stacked and complete! You are now ready for the decoration!
Step 8
Using the piping bag with buttercream, pipe pearls (aka dots) around each tier to create a border.
Step 9
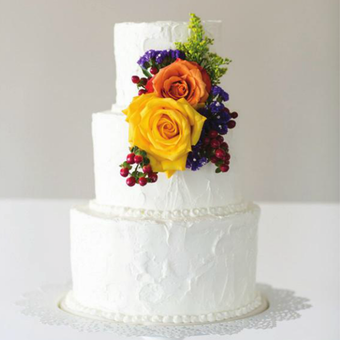
To safely insert fresh flowers into your cake, just trim the stems to about 2" and place the stem into the straw. The flowers can now be inserted into the cake without worrying about the flowers contaminating the cake.
Step 10
Continue adding flowers (or other decorations) until the cake is finished. Your cake is now complete! Have you had success making a tiered cake for a wedding or other event before? I would love to hear about your cake making making and decorating tips in the comments section below!
xoxo
Megan
You might also like...
The calendar may say it is spring, but the snow that is currently sitting outside is not exactly screaming spring (but that may just be me). So to try and help get you (and me!) in a spring state of mind I thought a nice floral themed post would be appropriate for today's wedding Wednesday post. When choosing the flowers you want to incorporate into your wedding day design, there are a few things that you should keep in mind: availability, cost, and durability. - Availability. Since most bride and grooms will select their flowers approximately 6-9 months before their wedding they don't really think about what will or will not be in season at that time. This should be the first thing you ask your local florist. Your florist will probably be able to find your favorite flower anytime of the year, but this would be because they would be shipping in those blooms from somewhere else in the world (thus a price increase that may not be as beautiful as the bloom). Which takes us to point number 2...
- Cost. While some flowers are more expensive than others, ones that are out of season will also cost more than ones in season. Let your florist know your floral budget upfront since all the arrangements will be priced out based on the flowers you choose.
- Durability. Unlike most events when you buy floral arrangements, the ones on your wedding day won't just be sitting there looking pretty. Look for flowers that have a higher durability when selecting the ones for your bouquets as those will be thrown around a little more than the ones just sitting on the tables.
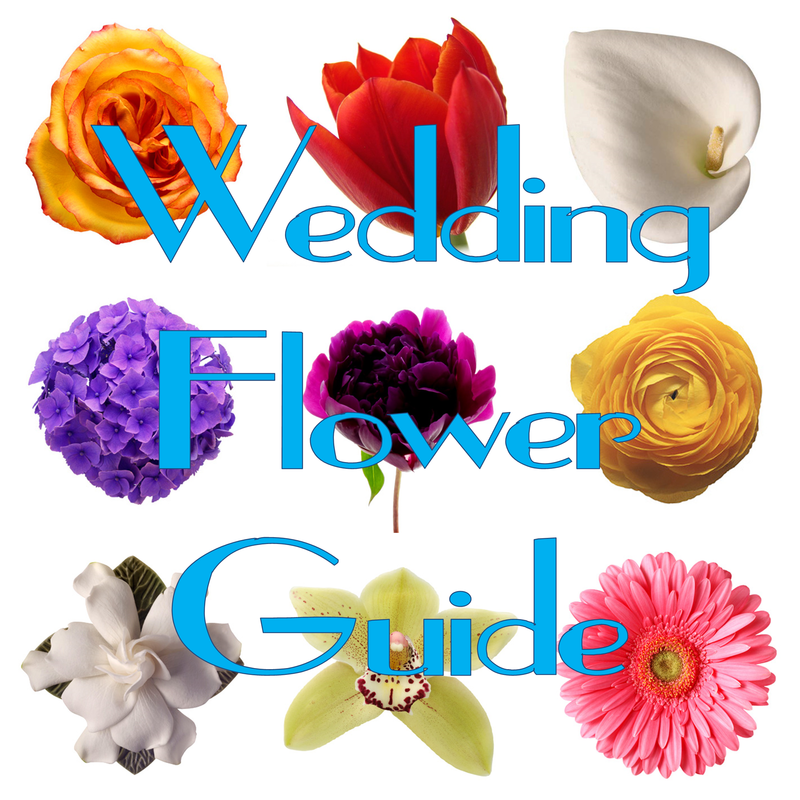
Once you take these factors into consideration have some fun picking out your wedding day bouquet! If this still seems daunting here are some of the most popular wedding flowers that will set you in the right direction. 1. Roses
2. Tulips
3. Calla Lily
4. Lily of the Valley
5. Hydrangeas
6. Peonies
7. Ranunculus
8. Sweat Peas
9. Gardenias
10. Orchids
11. Gerber Daisies
12. Casablanca Lilies
What is your favorite flower that you would include in your wedding day bouquet?
xoxo
Megan
You might also like...
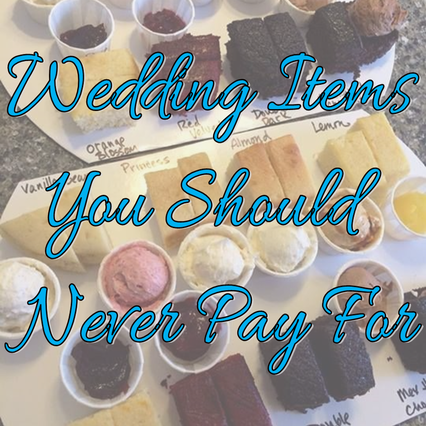
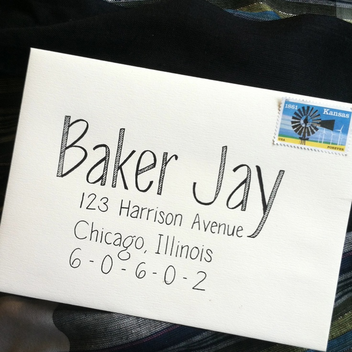
Planning a wedding can definitely put a strain on the checkbook, no matter what the budget is. You don't want to leave anything out like flowers or cut your great Aunt Emma from the guest list, but at the same time you don't want to have to take out a second mortgage on your house. So how do you keep your expenses in check? Well there are actually a few things that you should NEVER pay for when it comes to planning your wedding. 1. A Wedding Website. With everything (and everyone) connected to the internet 24/7 it is no surprise that having a wedding website is considered standard on the wedding planning check-list. While you could pay for your own domain name, there is really no reason to. Most wedding planning sites, like The Knot, offer this service for free. The site is only going to be useful for a few months so why bother paying for it? 2. Extra Photos. Most photographers offer wedding picture packages which ends up giving the couple a "discount" if they were to purchase each of those items individually. However, if you were never going to purchase all those individual prints you end up paying for more than if you paid for everything a la carte. Only pay for what you want no matter the "discount." 3. Online Invitations. If you know how much I love discounts you would know I NEVER make a purchase online without 1.free shipping and 2.searching for an online discount code. 9/10 I can always find coupon codes for free shipping or additional discounts. Search wedding message boards, coupon sites ( Living Social and Groupon are great places to start) and signup for sites email lists to get the best deal. Never pay full price for anything you order online, especially invitations. 4. Personal Calligrapher. And along those same lines don't pay for a personal calligrapher. If you handwriting isn't picture perfect, download a FREE font from online, create a template for your place cards and envelopes and print them yourself. However, if you know someone that can make your invitations look like you paid an arm and a leg for you could maybe ask that they help you out and that could be their wedding present to you.
5. First Meeting Fees. Whether you are trying on dresses for the first time, cake tasting or meeting with a florist to go over ideas you should NEVER pay for a first meeting (it's part of their job). Most of the time if there is a fee (mostly for cake tasting) that fee should apply to your order when you place it. There are so many vendors when it comes to finding a dress, cake, flowers, etc. that you can easily find another vendor if one tries to charge you a first meeting fee.
Do you have any other tips on ways that you can avoid paying too much when planning your wedding?
xoxo
Megan
You might also like...
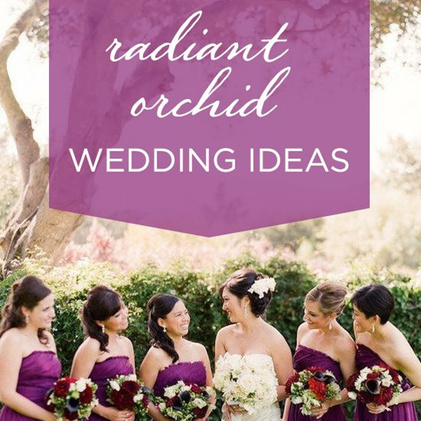
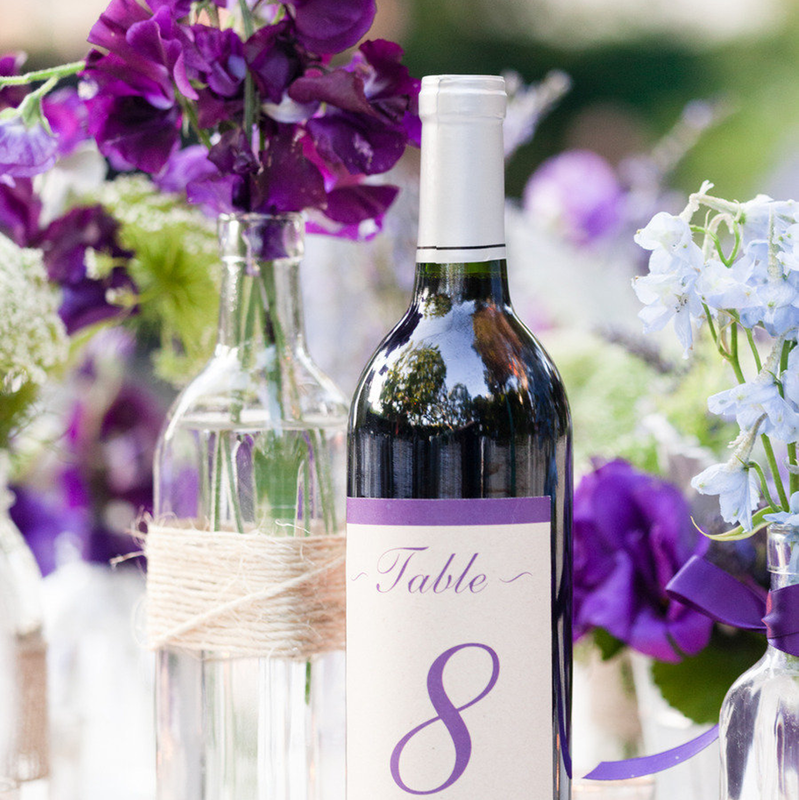
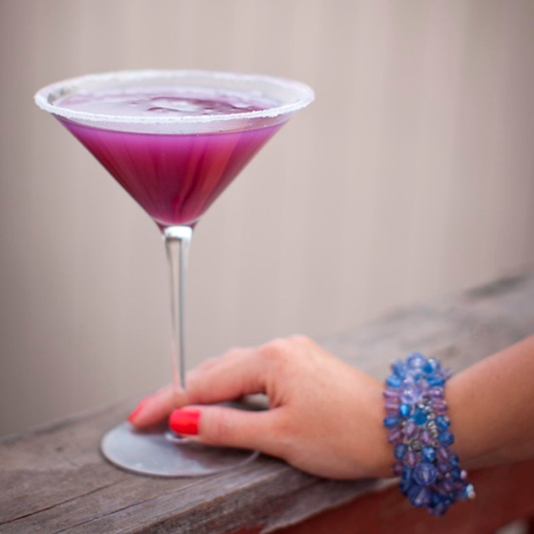
Another year means that Pantone has chosen a new color of the year. Be prepared to see a lot of purple this year as the 2014 color of the year is radiant orchid. Leatrice Eiseman, executive director of the Pantone Color Institute, describes the choice of radiant orchid perfectly: "Radiant Orchid reaches across the color wheel to intrigue the eye and spark the imagination. An invitation to innovation, Radiant Orchid encourages expanded creativity and originality, which is increasingly valued in today’s society. An enchanting harmony of fuchsia, purple and pink undertones, Radiant Orchid inspires confidence and emanates great joy, love and health. It is a captivating purple, one that draws you in with its beguiling charm.” For this reason, radiant orchid is sure to be a popular color choice not just for events but also for weddings in 2014. Here are some great ways that you can incorporate this vibrant hue into your wedding planning for 2014...
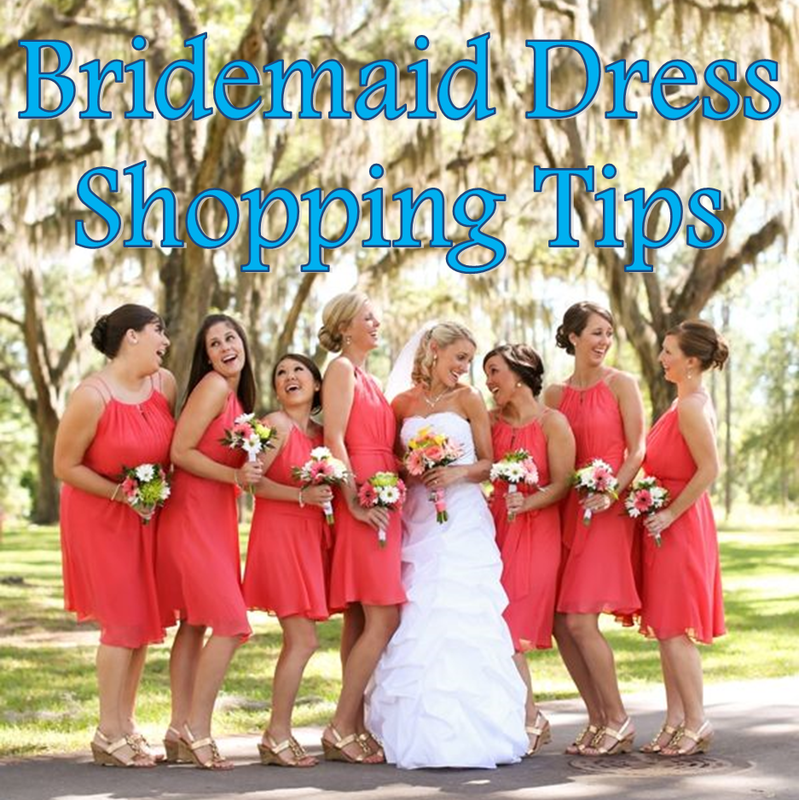
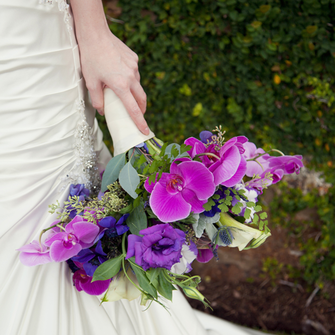
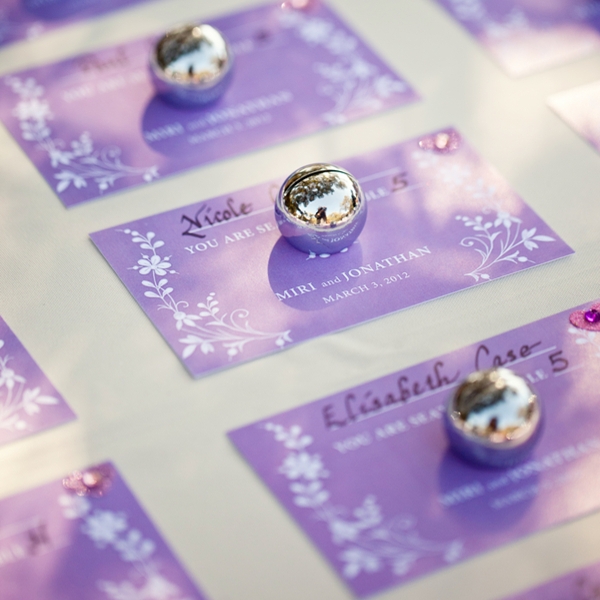
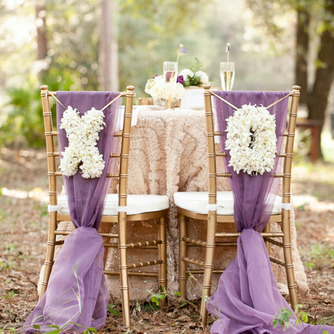
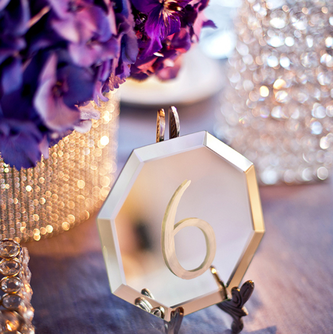
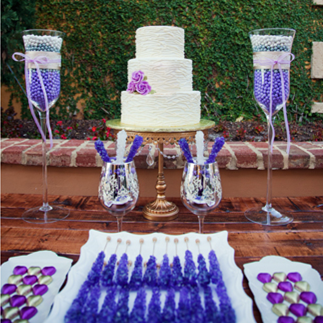
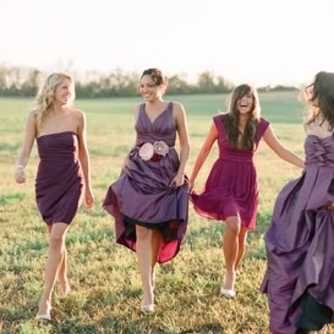
My first choice of integrating the color of the year into your event design is with the floral bouquets. Set against your white dress the purple bouquet will really pop. Create your bouquet using flowers in varying purple hues to make it unique like this one below. With Radiant Orchid as your wedding color you want to look for fun ways to incorporate the shade into the wedding so as not to over-do it. Taking the color and using it for your place cards, like these from The Frosted Petticoat, or creating labels, like the ones on the wine bottles, is the perfect solution! When it comes to choosing a color to pair with radiant orchid it is best to stick with neutral tones. Golds, silvers, grays, tans, and whites are perfect choices for weddings. A great example is this pairing of champagne and orchid from Every Last Detail. Here is another great coloring pairing example from La Fete Weddings. The use of the clear stones, mirrors and silver table accessories really lets the purple shine as the statement color without it being overwhelming. You don't have to shy away from integrating the color into your food and beverage choices. Create a candy and dessert bar with a variety of purple, white and gold candies like this one from Style Unveiled or have your caterer create a signature cocktail in the radiant orchid hue. And you can't forget about your bridesmaids! Radiant orchid will be found in women's fashion throughout 2014, so finding dresses for your girls will be easy to do. A great option is to have your girl's chose dresses in a variety of shades which will blend together perfectly when they are all standing by your side on your wedding day. There are just so many options when it comes to finding ways to include the Pantone color of the year into your wedding! What is your favorite radiant orchid wedding idea?
xoxo
Megan
You might also like...
|


 RSS Feed